Setting Preferences
After working within the application for some time, you will likely have developed a preference for a particular AI provider. You can set this provider as the default in your preferences. The environment determines which current language and image models belong to it.
Where to Find
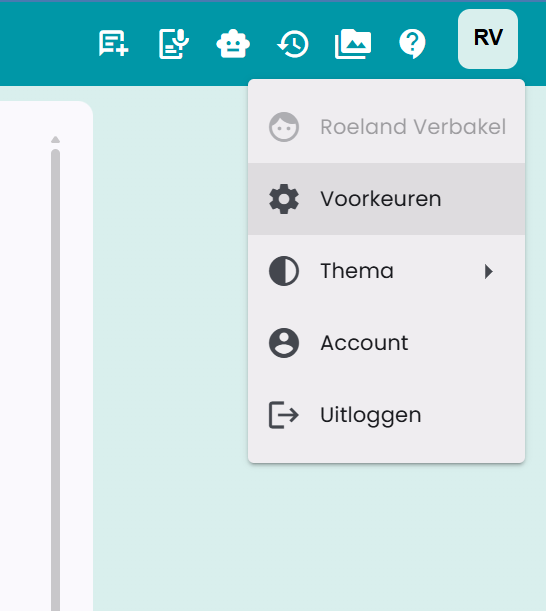
You can find the preferences at the top right of the application, in the profile menu, under Preferences.
The Preferences Page
Below is a screenshot of the Preferences page.
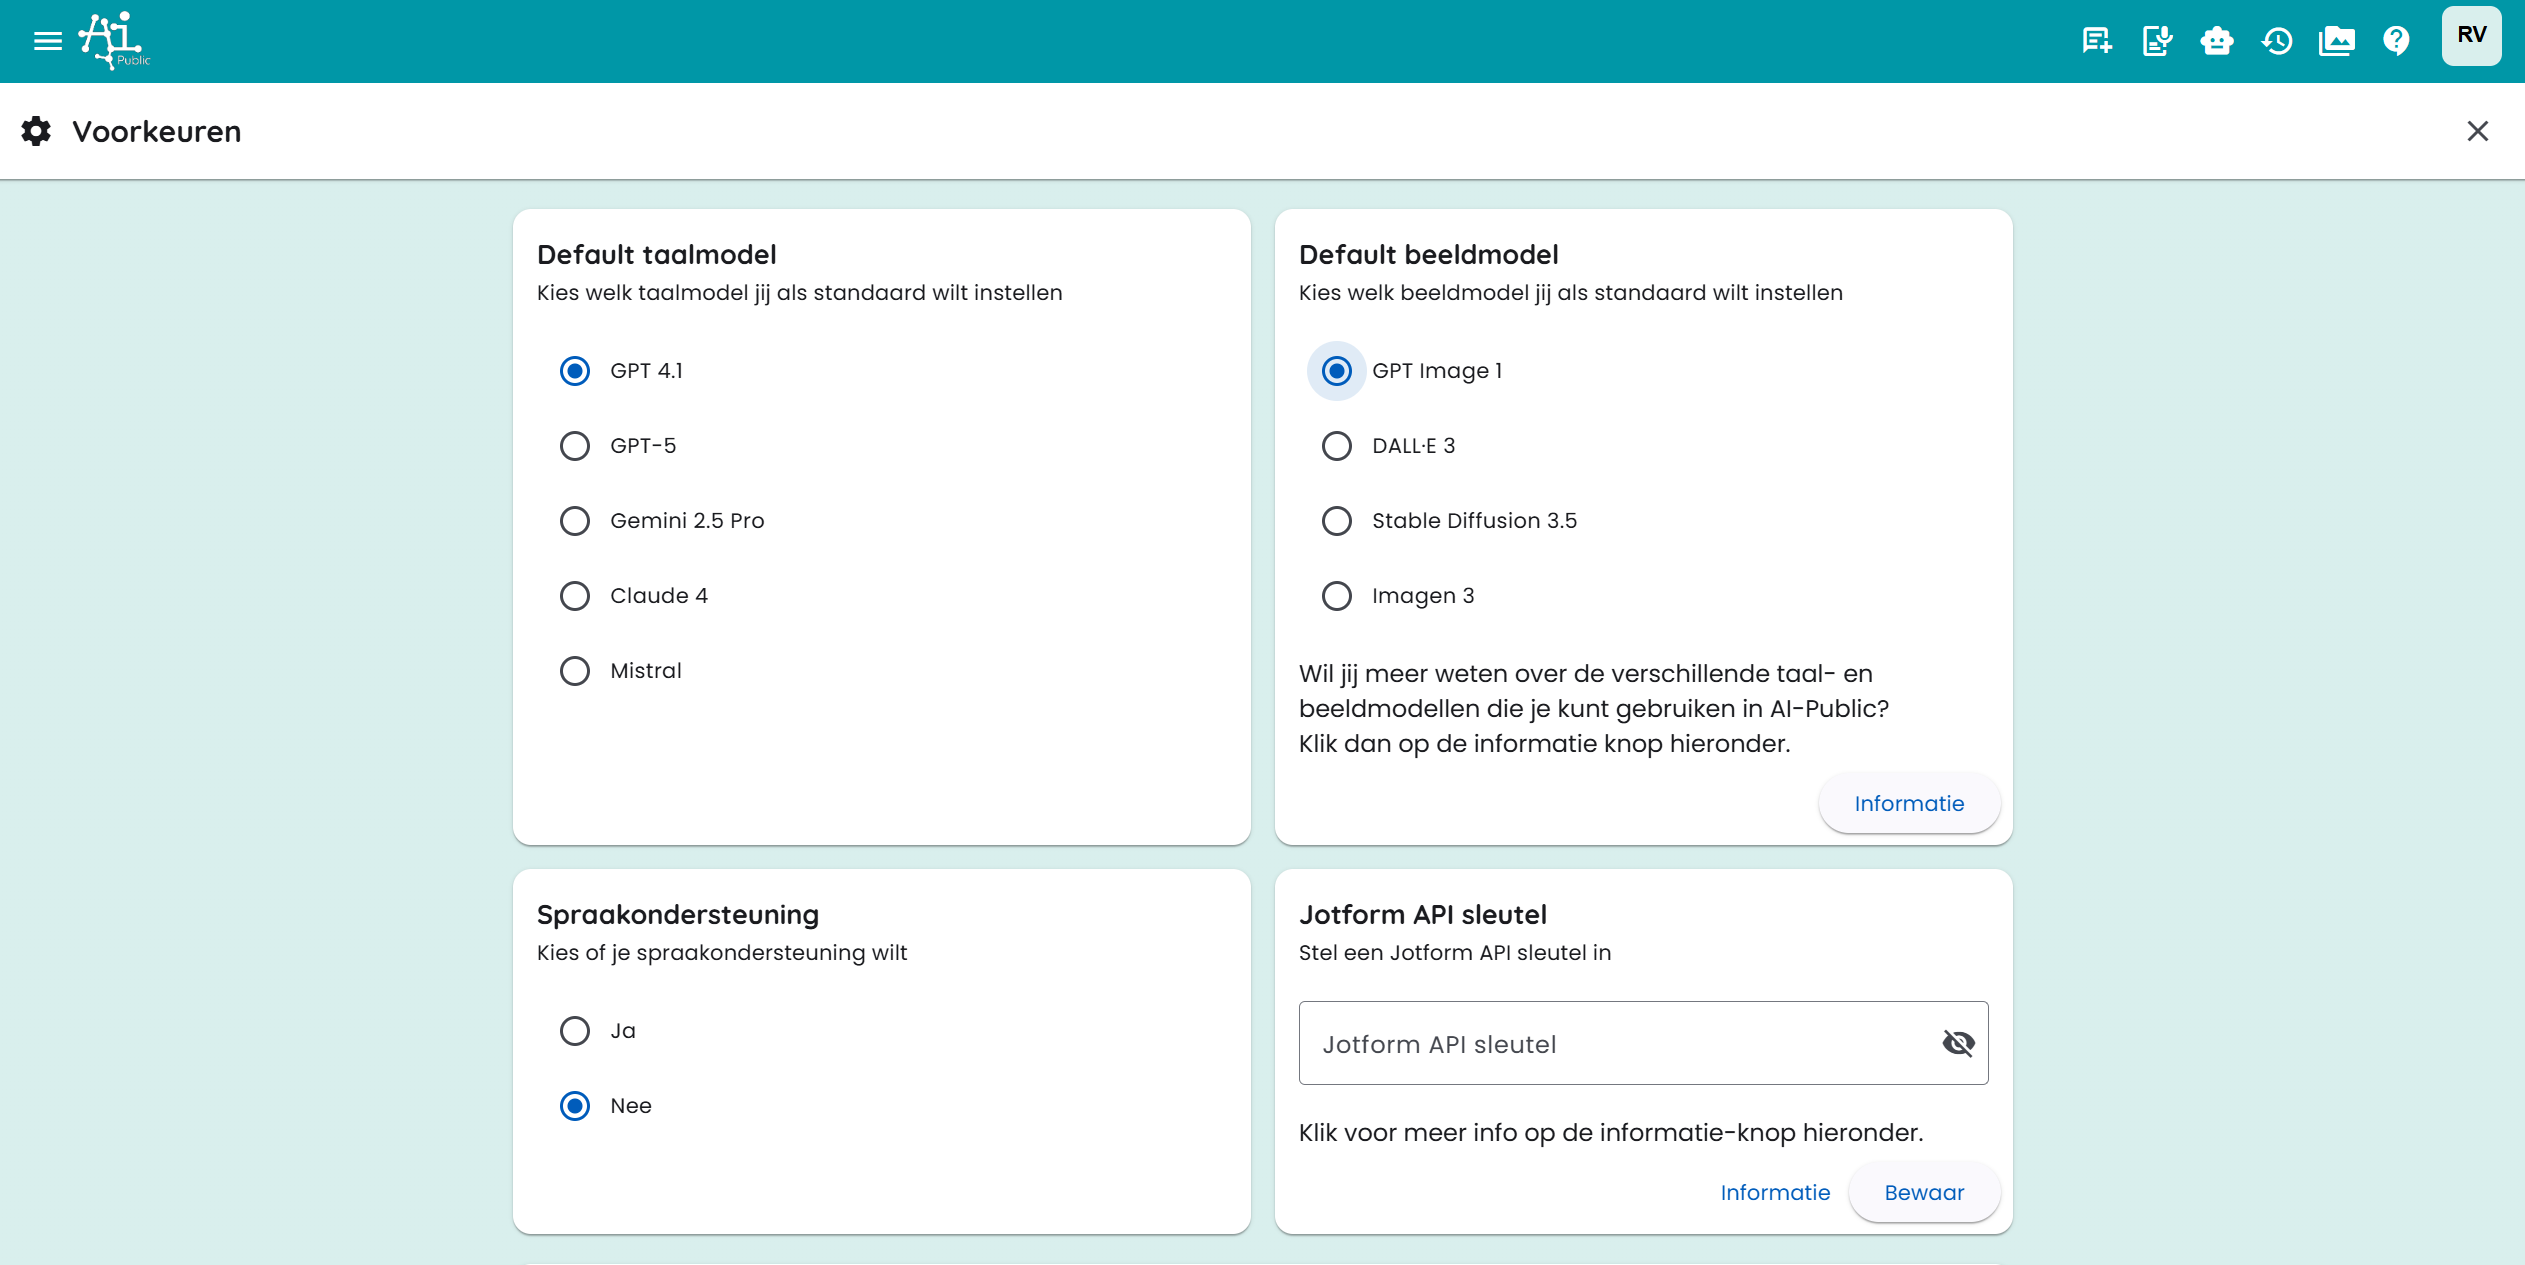
On this page, you can configure various default settings:
- Default AI Provider: Choose the provider that will be used by default for new chats and image generation.
- Model Information: View which current language and image models are available per provider.
- Other settings related to the operation of the chat and tools.
Drive Connections
Under Drive Connections, you can link cloud storage to AI-Public. After that, you can upload files directly from File Manager or a document preview to a selected cloud folder.
You can set up the following types of connections:
- Google Drive: choose a folder from your own Google Drive.
- Shared Drive: choose a folder from a shared Google Drive.
- OneDrive: choose a folder from your own OneDrive.
- SharePoint: search for a SharePoint site, choose a document library, and then select the desired folder.
Adding a connection works as follows:
- Open Preferences.
- Go to Drive Connections.
- Click Add Connection.
- Choose the type of cloud storage.
- Click the folder button to select a target folder.
- Save the connection.
For Google Drive and Shared Drive, you must be logged in with a Google account or reauthorize. For OneDrive and SharePoint, you must be logged in with a Microsoft account or reauthorize. With SharePoint, you do not need to manually enter site, library, or folder IDs; you select everything via the folder picker.
You can create multiple connections. When uploading, you then choose to which linked folder the file should be sent. Set a connection to inactive if you want to temporarily disable it.
Data Migration
If the administrator has enabled migration for your environment, you will see the Migration tab in your account. This allows you to transfer data from the configured source environment, for example Demo or Plein.
First, click Check Available Sources. AI-Public will then check if there is an account in the source environment that belongs to you. If data is found, you can choose what to transfer with Start Migration.
You can choose from items such as:
- profile data;
- chats and chat messages;
- files.
- assistants you created yourself, including linked files and images (existing sharing settings are not copied).
Employee and user roles from the source environment are not migrated. The migration runs in the background. You can continue to use the application while the migration is performed.
After a completed migration, you cannot start the same migration again. This prevents duplicate data transfers.
Roles and Links
AI-Public offers the possibility to set roles. A role could be, for example: 'Marketing Content Creator', 'Legal Assistant for Contract Analysis', or 'HR Support for Policy Questions'.
You can also add custom links to your dashboard for quick access to frequently used internal or external resources. Give the link a name and enter the URL.
These roles and links appear on your dashboard for easy access.
You can read more about roles in the related article.
Speech Support and Text to Audio
If you need speech support, you can set this option to "Yes". An extra button will then appear next to the answer. This allows you to have the text read aloud.
For Text to Audio, you can also save personal settings from the text-to-audio input field. AI-Public will then remember your chosen model, language, voice, and system prompt. The available TTS models and voices depend on the AI provider available in the environment. For example, if you choose Google as your preferred provider, the linked Google speech models will also be used as default where possible.
You can always restore saved text-to-audio settings to the default settings.
Image Generation Preferences
You can also save personal settings for Text to Image. AI-Public remembers, among other things:
- the chosen image model;
- the default format (Automatic, Square, Landscape, or Portrait);
- style;
- number of variants;
- optional color preferences.
With Restore Defaults, you remove your saved image settings. In edit mode, AI-Public does not choose a manual format; the model then preserves the dimensions of the source image as much as possible.
Tools Settings
The environment determines which tools are available. In Preferences → Tools, you then choose which visible tools and connections may be used by default in your chats.
For regular tools, you can choose a personal setting:
- Automatic: the AI decides when the tool is used.
- On: the tool is always directly available in the chat.
- Off: the tool is not available to you.
A personal setting never makes a tool visible that is hidden by the administrator. With Restore Default Values, you use the environment settings again.
Connections
Under Connections are the Google and Microsoft connectors and MCP servers available to you. Turn on a connection once and complete the sign-in if necessary. The choice is saved in your account and therefore also applies in new chats and on other devices.
- Built-in Google and Microsoft connections work on web, mobile, and desktop.
- Remote Streamable HTTP MCP servers work on all three platforms.
- Local stdio-MCP servers are only on the computer where you install them in the desktop app.
- The chat settings show which connections are available in the current chat.
The built-in Google and Microsoft tools are provider-independent. Your preferred provider does not change when you enable a connection. The connections remain available with OpenAI, Claude, Gemini, and Mistral, as far as the chosen model supports tool usage.
On desktop, you use the same Google and Microsoft connections as on web and mobile. Local stdio-MCP servers, for example for Nextcloud, are separate from these account connections and apply only on that computer.
Read more at Connections and MCP.
General Instructions and Information
In this section, you can set the so-called "system prompt."
With a system prompt, you can give instructions to the AI model. It is an instruction you provide to the model to specifically shape the task or behavior of the model. You can specify what kind of output you expect from the AI model. It is a way to guide the model and prevent it from giving irrelevant or unwanted answers.
Some Examples of System Prompts
"I want you to be a professional and efficient assistant for business communication."
"Always remain formal and respectful in your language, aimed at a business audience."
"Focus on providing concrete, data-driven answers without unnecessary details."
The system prompt essentially sets the tone and expectations for the specific conversation or task you want to perform with the AI model.
You can also devise more advanced system prompts for specific tasks, such as summarizing a text: "Carefully analyze the given text and provide a concise but informative summary of the main points. Identify the core message and key details."
System Prompt and the Various AI Models
System prompts do not have the same influence on the outcome for every AI model. Large models usually follow instructions more carefully than fast or cost-effective models. It is interesting to experiment and see which provider and model work best for your input.
More Information
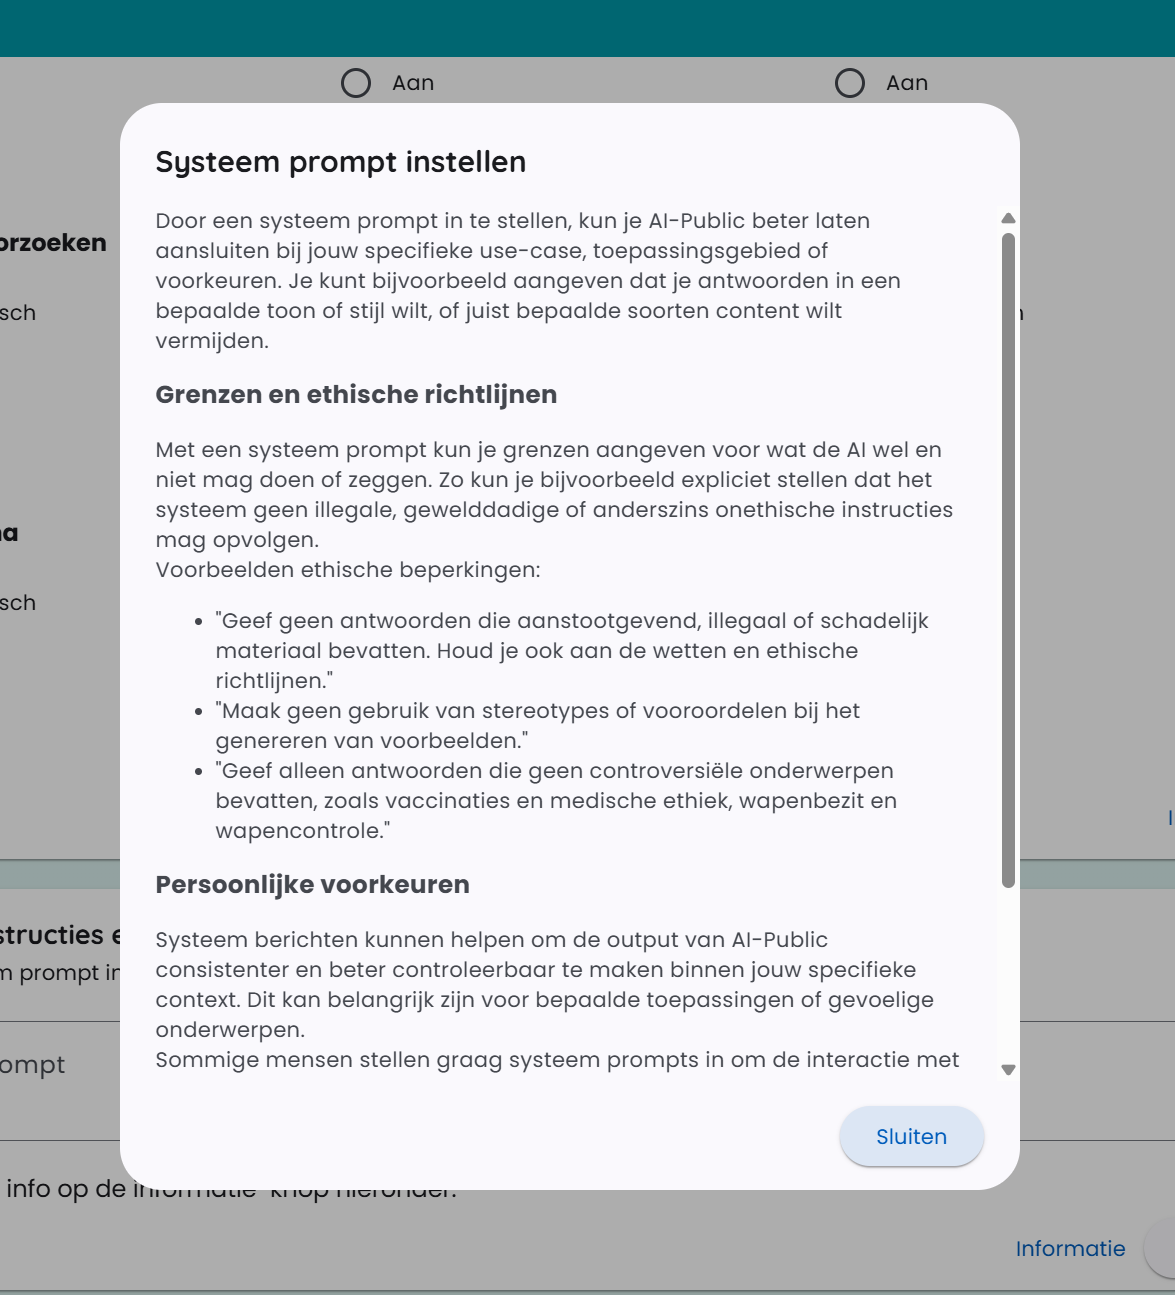
You will find much more explanation about system prompts near the input field. Click the “information” button for this. Below is a screenshot of the information window.